![[kushanshah seal]](i_ks_seal.jpg)
k u s h a n o
s a s a n i a n s
k u s h a n o
s a s a n i a n s
r e f e r e n c e s

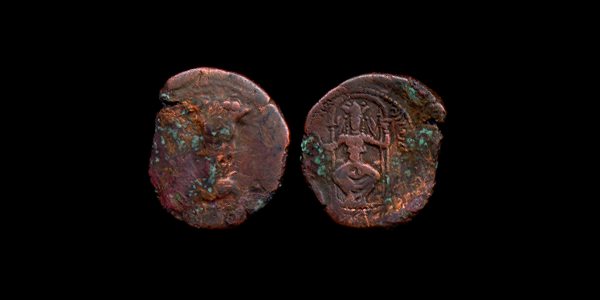
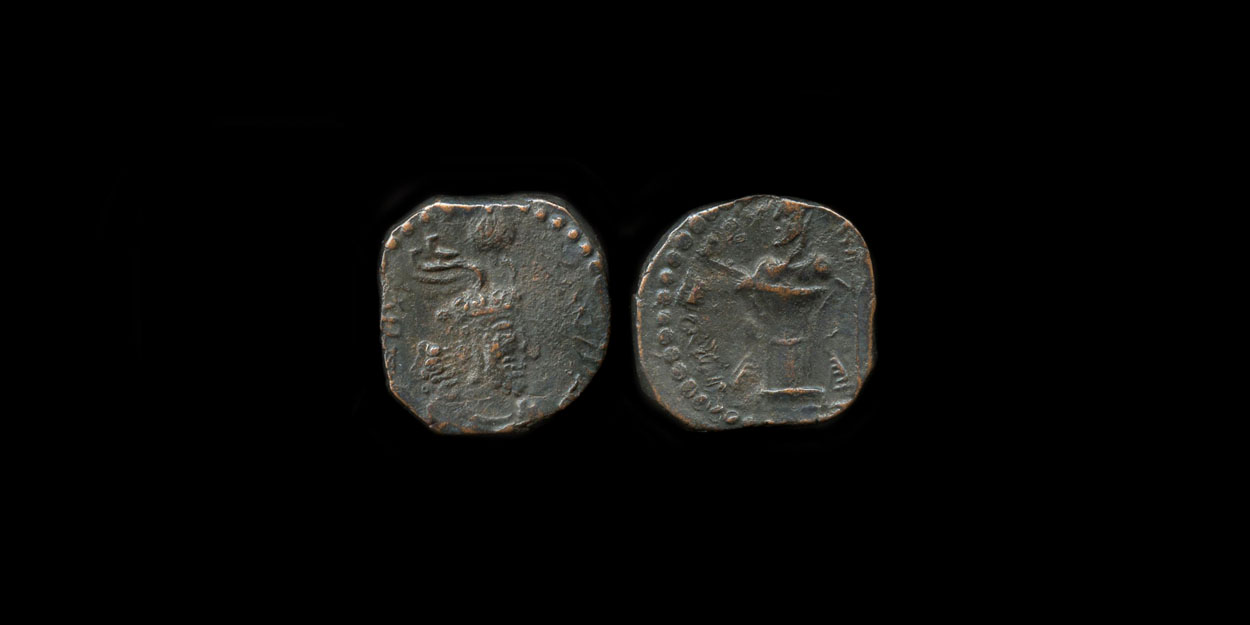
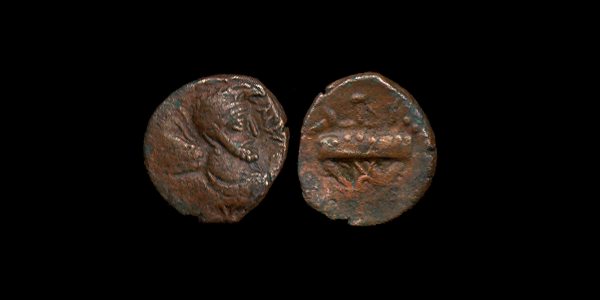
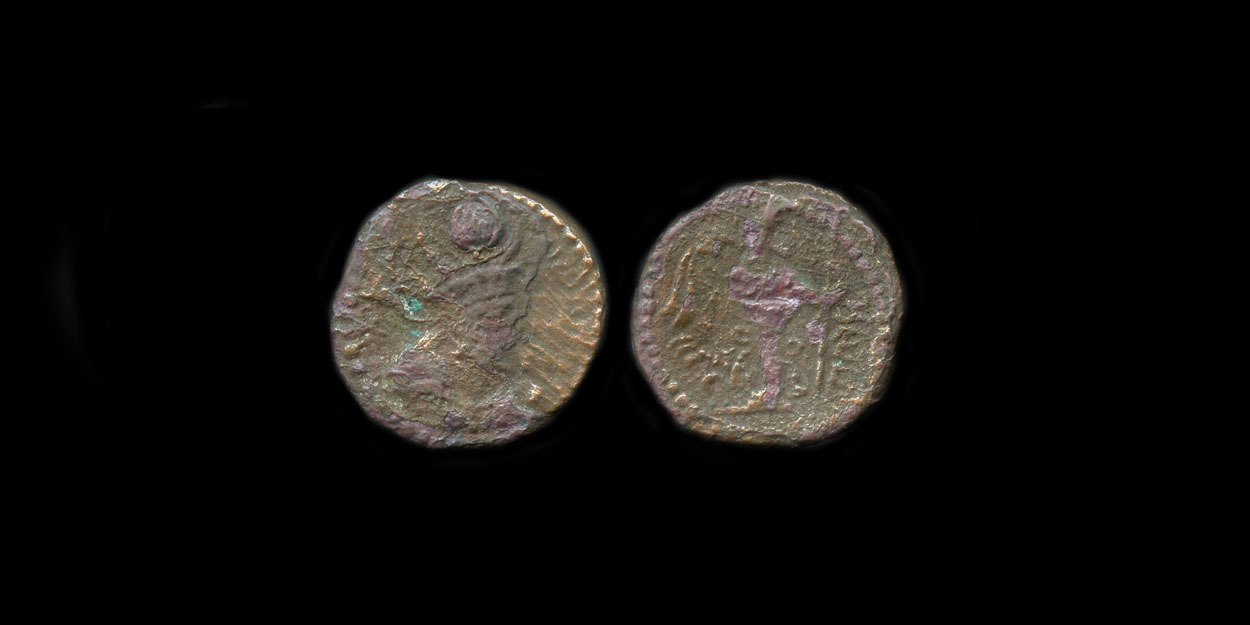
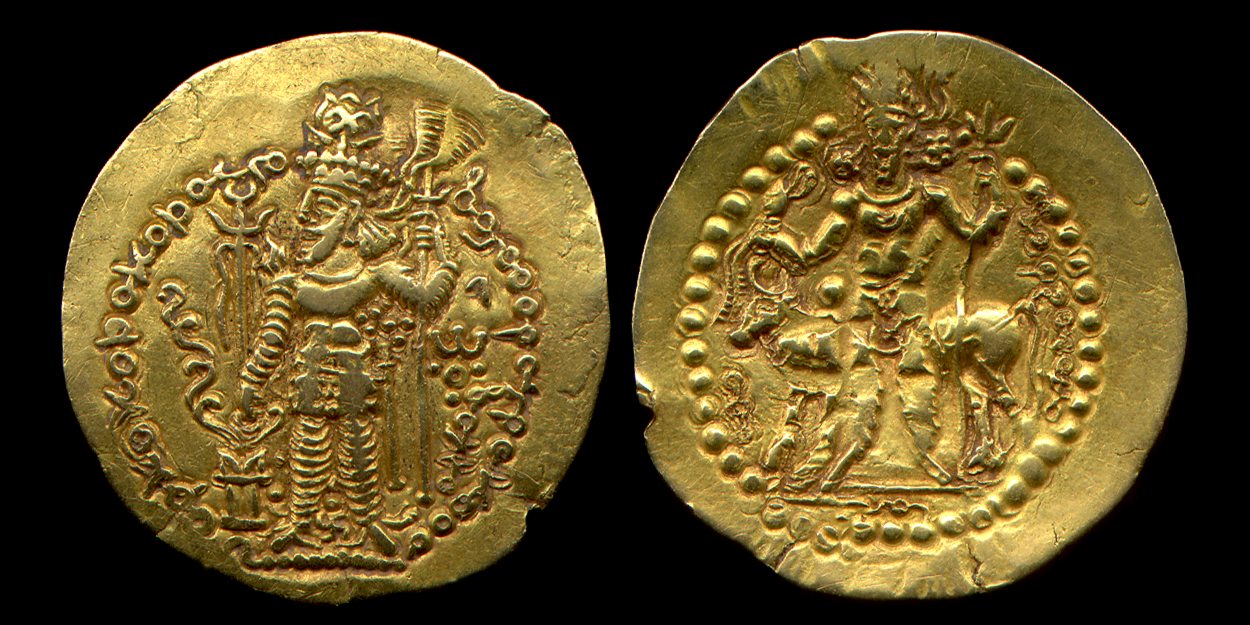
Anonymous (circa 230 - 250 AD)
AV Stater
Cribb SI 19, #56v.; Gobl Kushan 668.2; Mitchiner ACW 3395v., 1263v.
24 mm.
7.95 gm.
Die position=12h
Obverse: King standing left wearing sword, holding diademed trident above altar and second trident to right. Flames eminate from shoulders, 3 pellets between legs, 6 pellets inside halo around head and tamgha to right. 5 pellets in right field, 2 in left. Letter (?) behind king's head. Bactrian legend.
Reverse: Siva, with flaming halo and crescent on head, holding diadem and trident; and the bull (Cribb series IIIc/D12); tamgha left, and 2 pellets above arm. 4 pellets right, 1 pellet under bull. Swastika to left under bull's head. Bactrian legend.
![]()

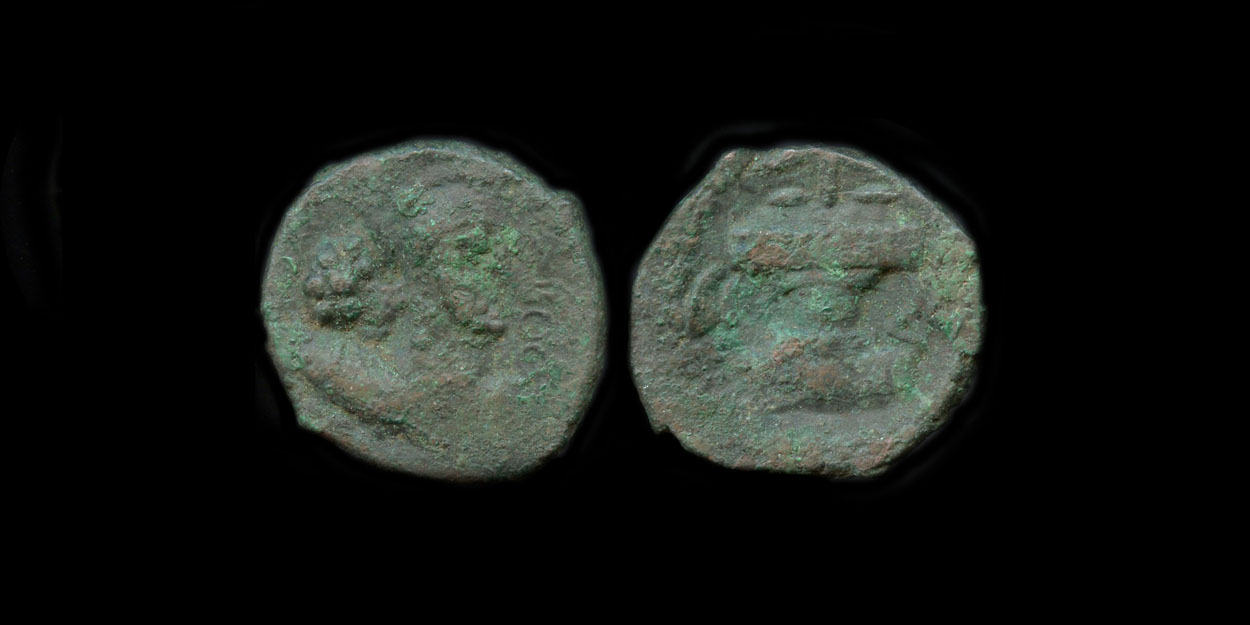
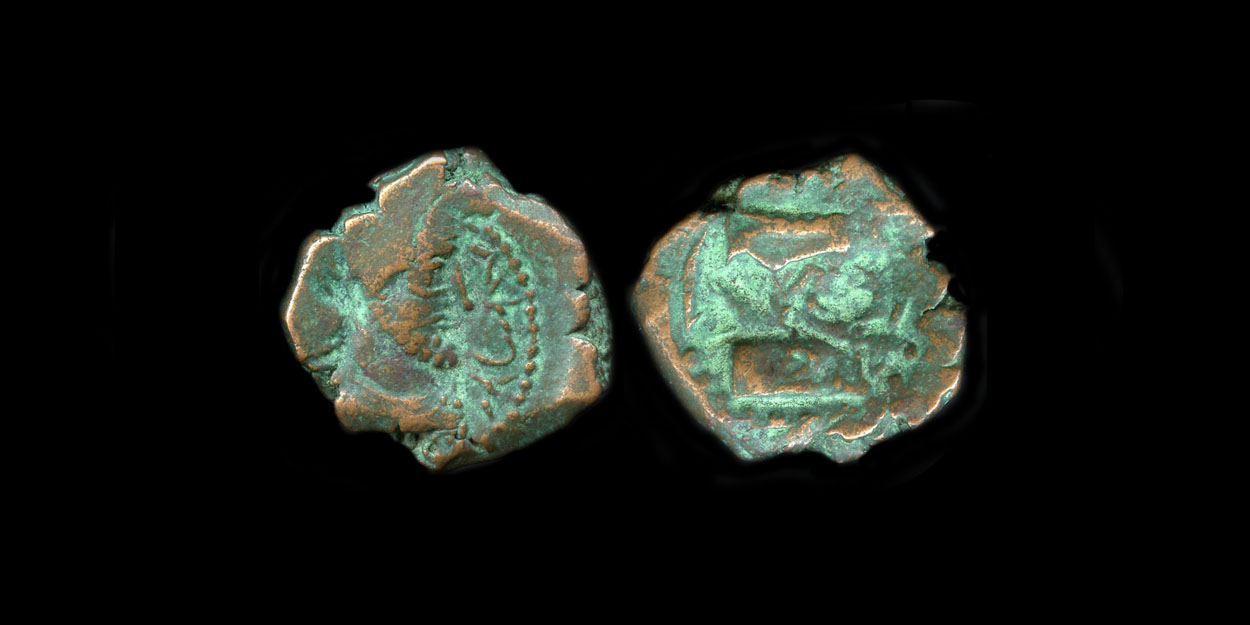
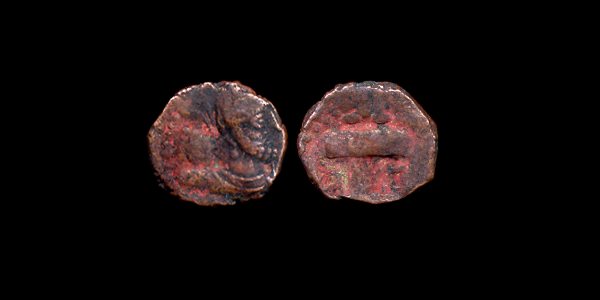
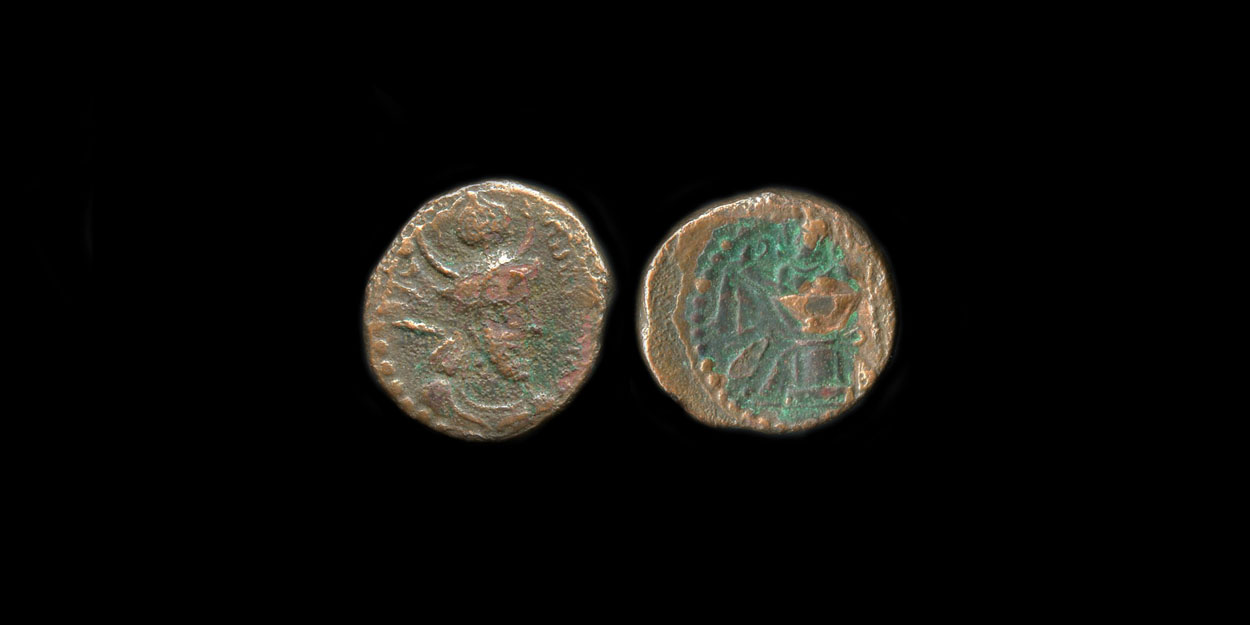
Ardashir I Kushanshah (circa 230 - 250 AD)
AE Drachm
Cribb SI 19, #15 (Bactrian issues); Mitchiner ACW -; Gobl Kushan 1114 [Shapur II]
16 x 18 mm.
2.56 gm.
Die position=11h
Obverse: King standing left wearing sword.
Reverse: Mithra seated right, holding diadem.
Note: Mistakenly attributed to 'Shapur' by Gobl and others.
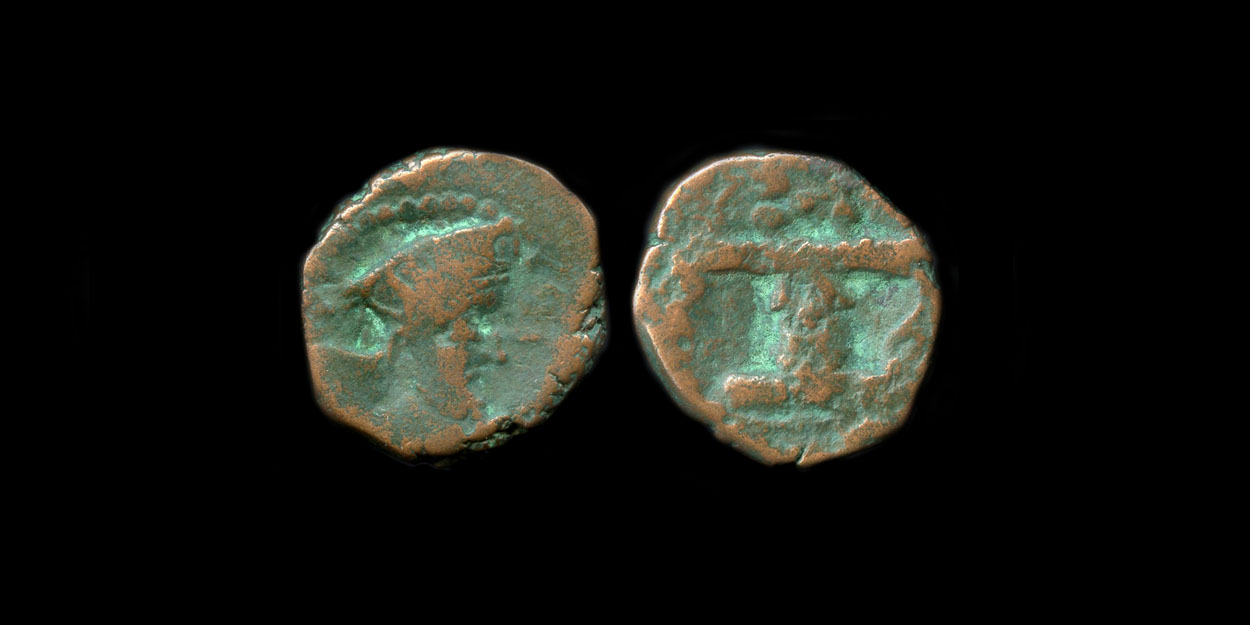
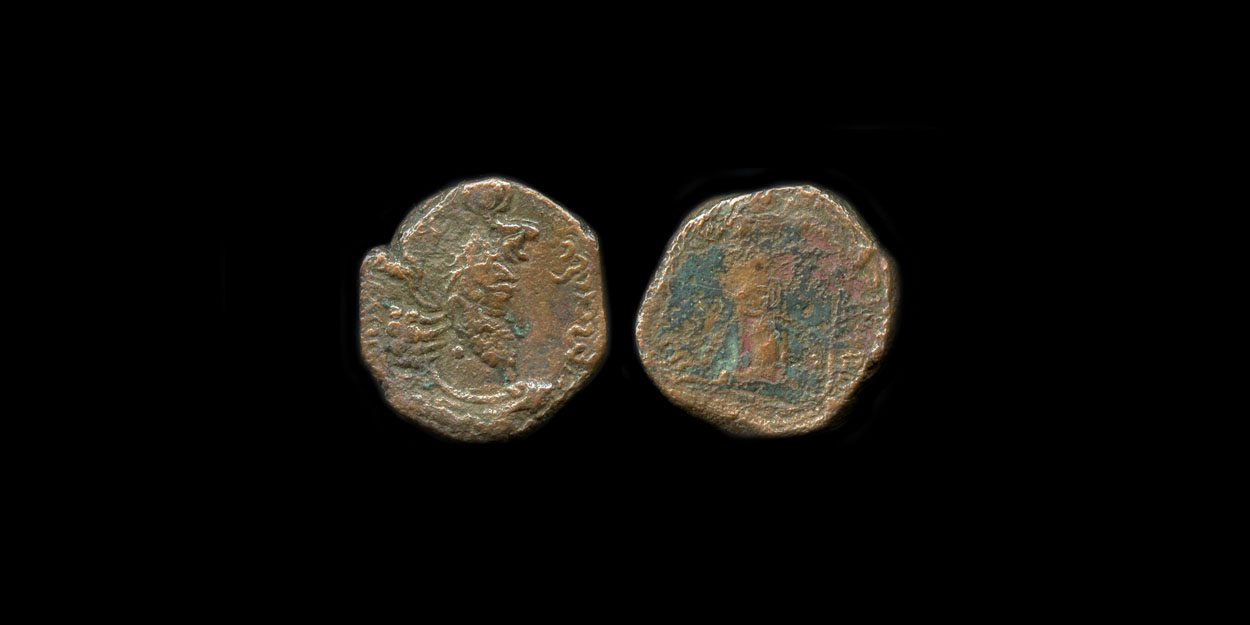
Ardashir I Kushanshah (circa 230 - 250 AD)
AE Drachm
Cribb SI 19, #16 (Bactrian issues); Mitchiner ACW 1264; Gobl Kushan 1028
17 x 19 mm.
2.80 gm.
Die position=12h
Obverse: Bust right (take my word for it).
Reverse: Goddess Anahita seated within niche.
Note: Courtesy Jamison T. Graff collection.
![]()

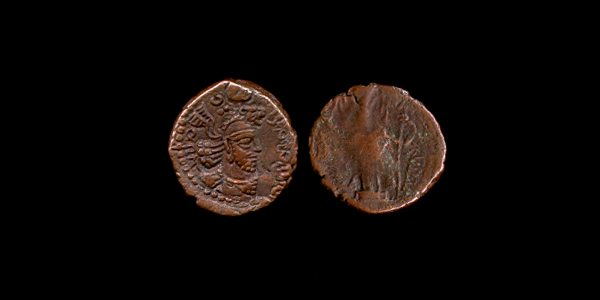
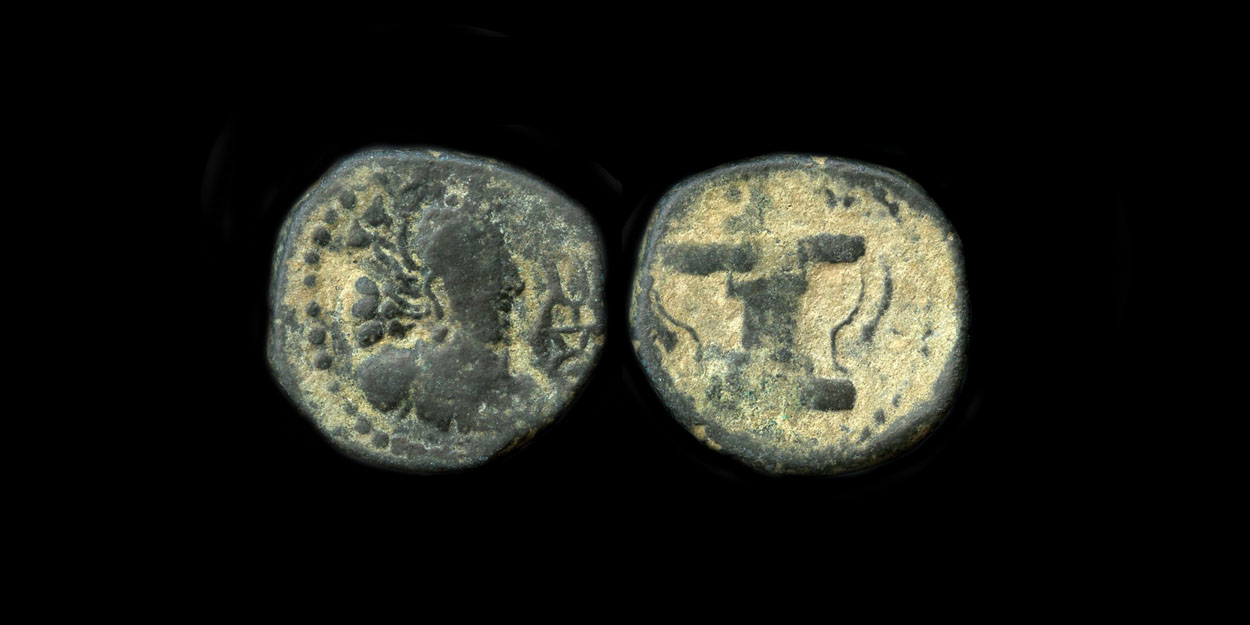
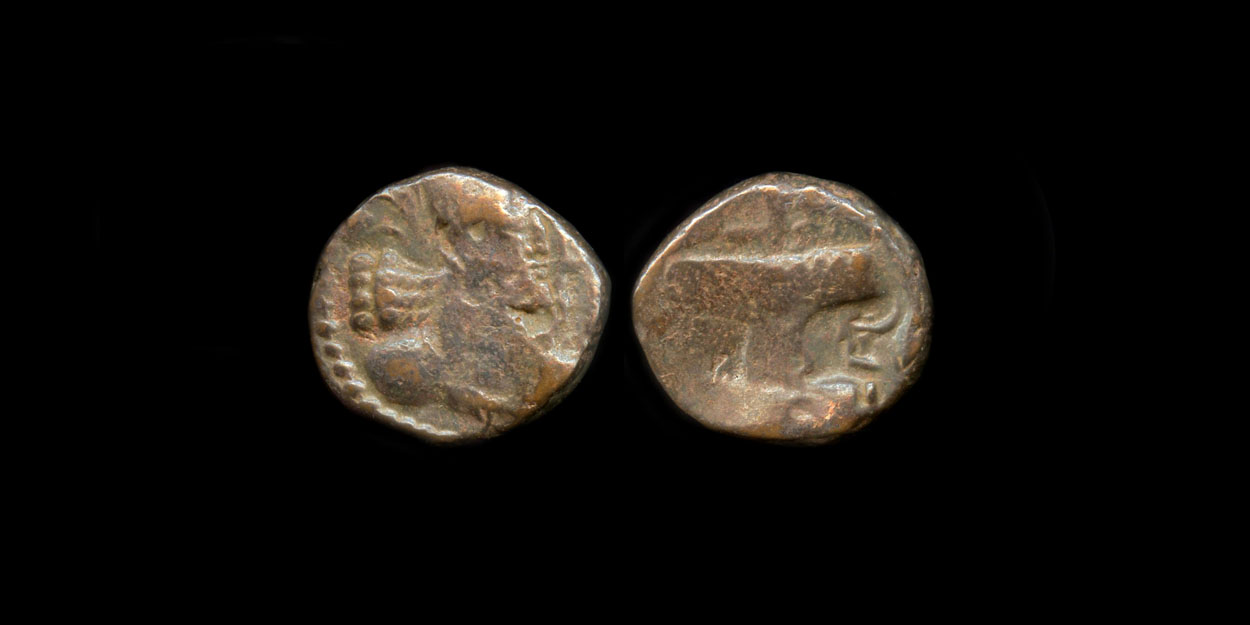
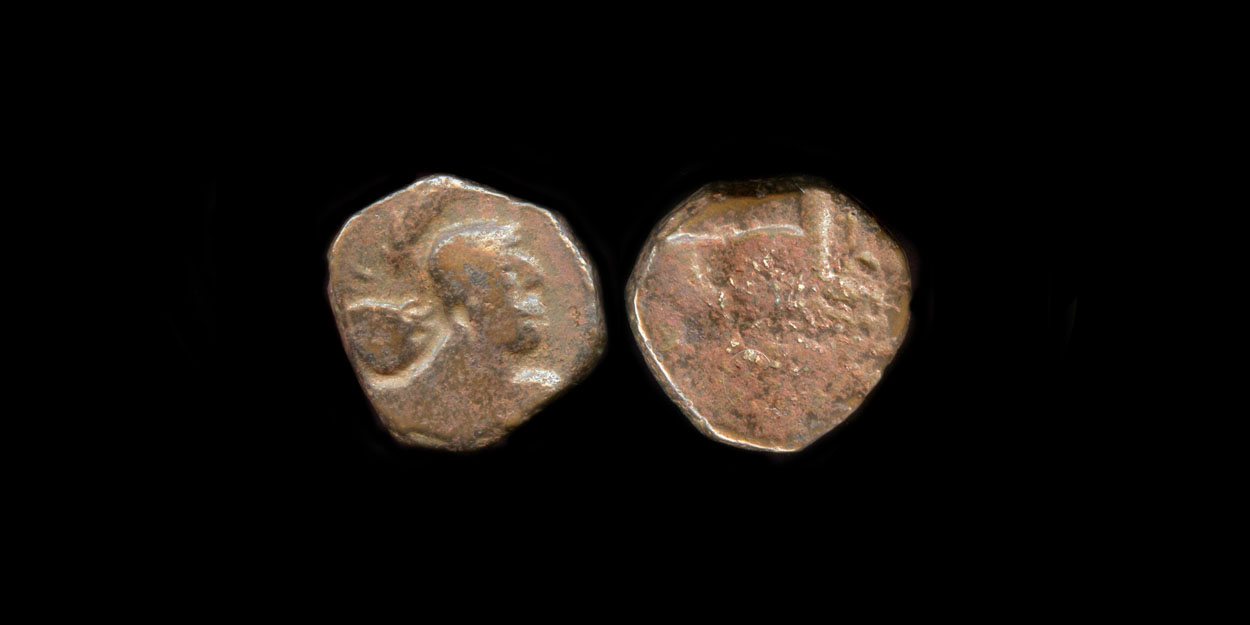
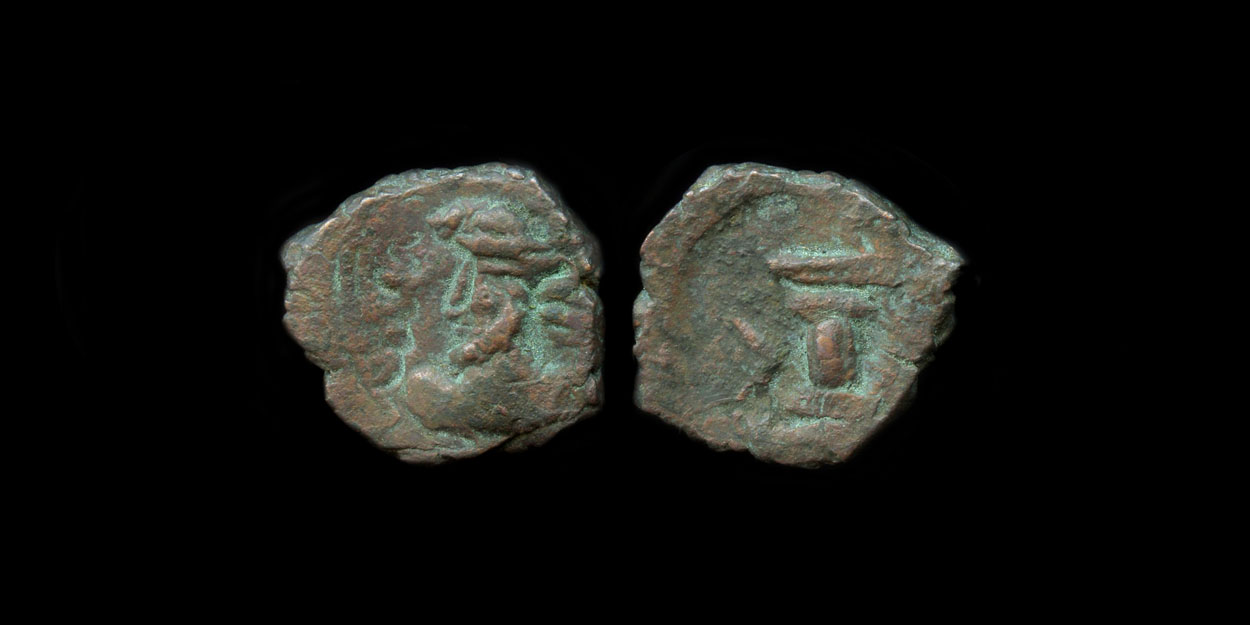
Peroz I Kushanshah (circa 250 - 265 AD)
AE Drachm
Cribb SI 19, #32 (Gandharan issues); Gobl Kushan 1117; Mitchiner ACW -
19 x 17 mm.
4.46 gm.
Die position=12h
Obverse: Bust right. Bactrian legend.
Reverse: Deity facing, on altar; Brahmi letter on altar shaft. Bactrian legend.
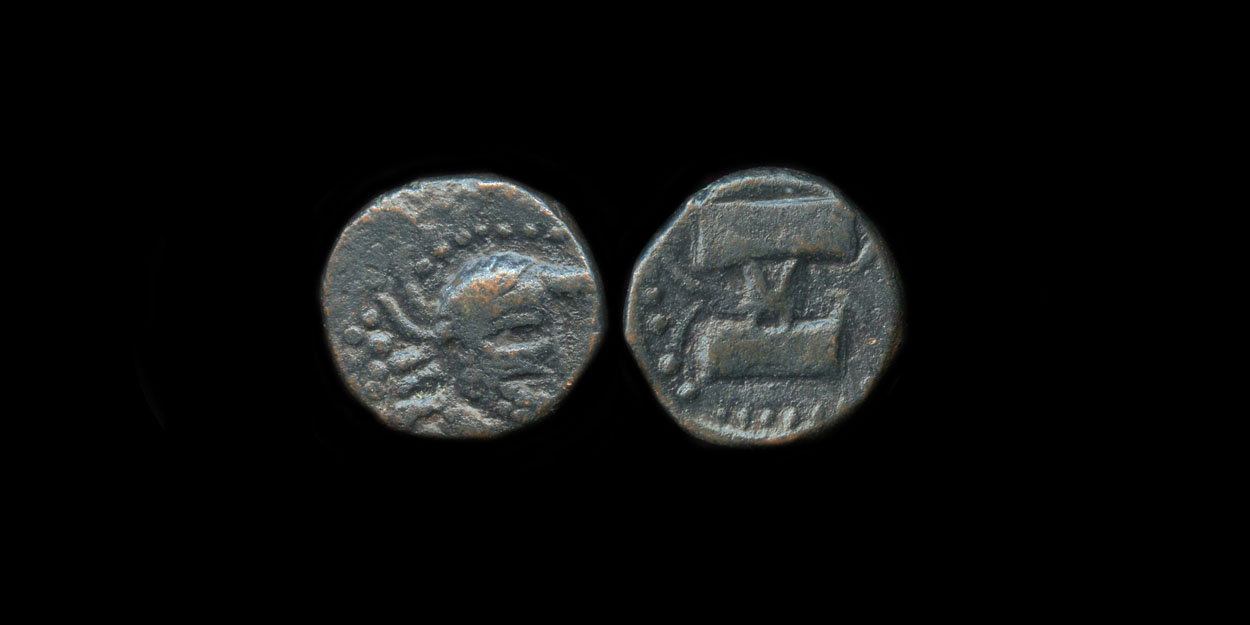
Peroz I Kushanshah (circa 250 - 265 AD)
AE Drachm
Cribb SI 19, #33
16 x 17 mm.
3.88 gm.
Die position=12h
Obverse: Bust right
Reverse: Fire altar.

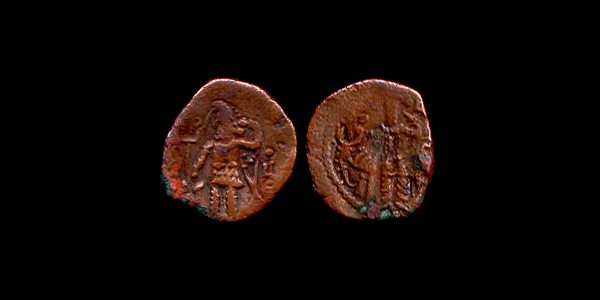
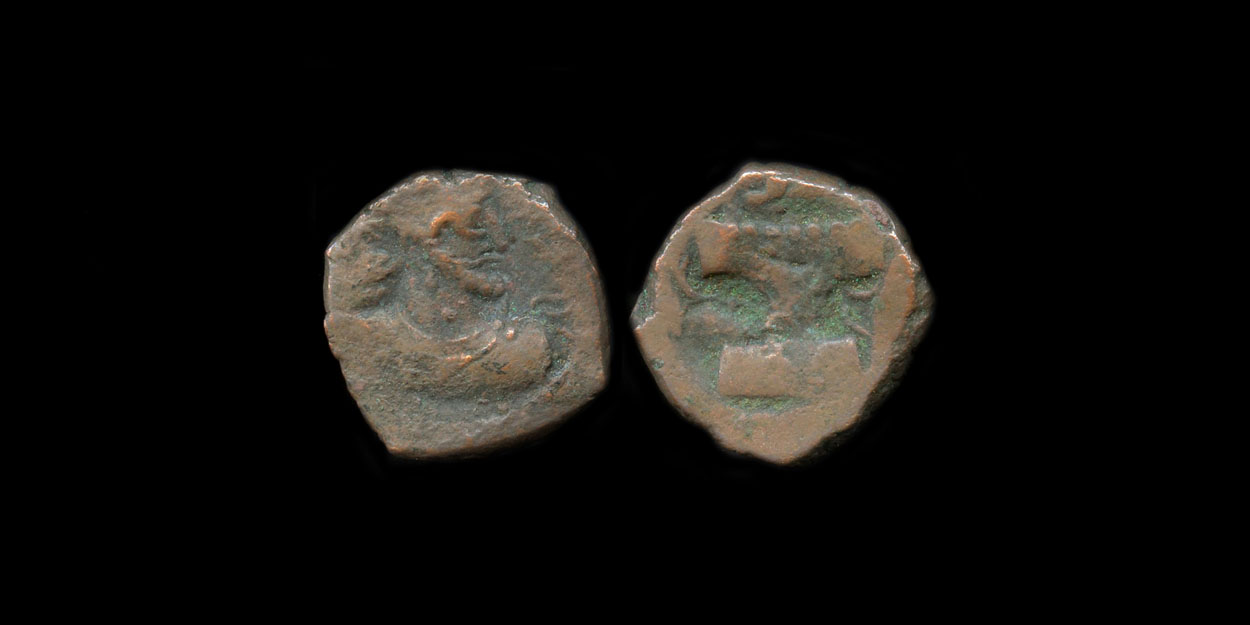
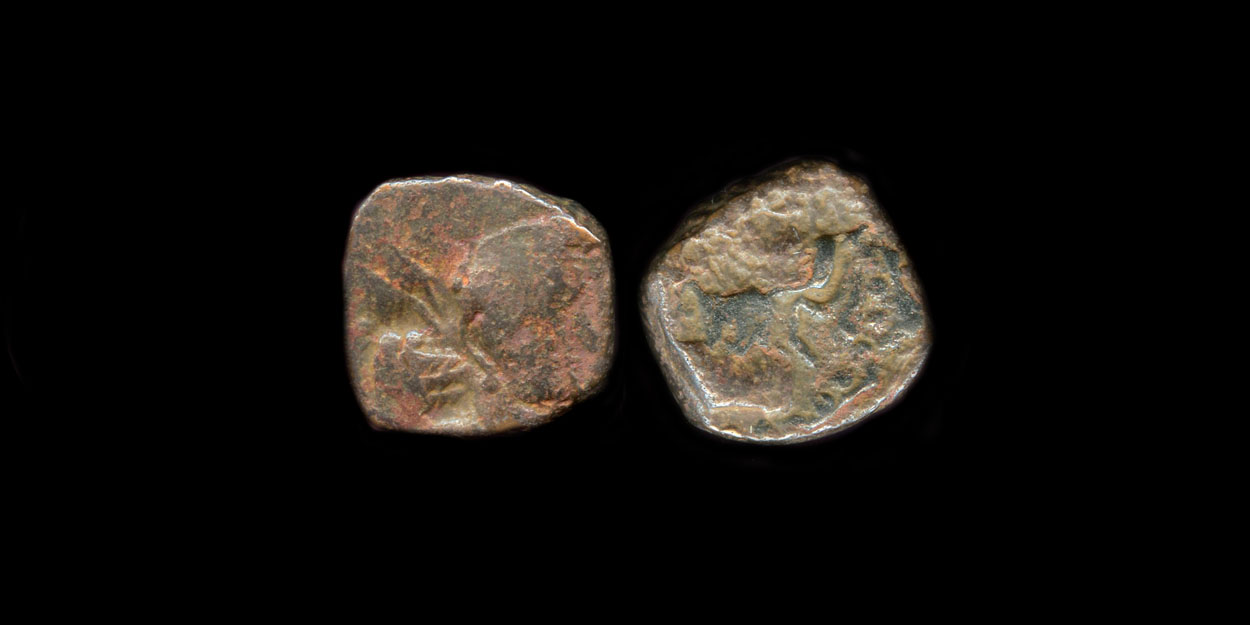
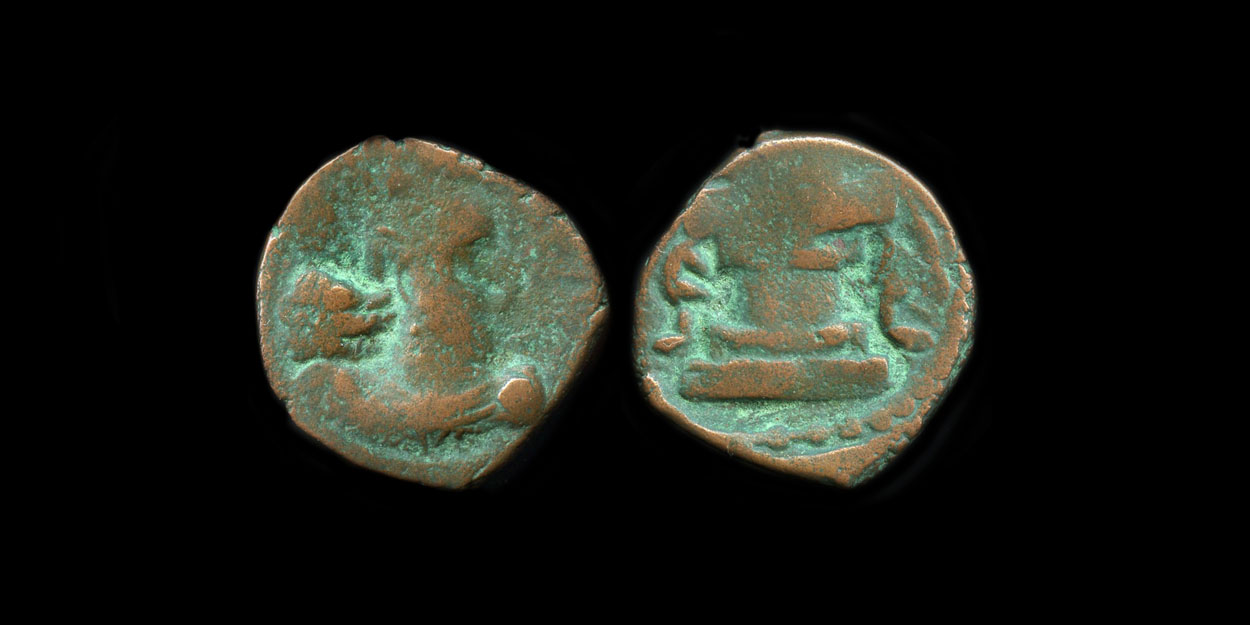
Peroz I Kushanshah (circa 250 - 265 AD)
AE Drachm
Cribb SI 19, #19; Gobl Kushan 1101
17 x 18 mm.
3.72 gm.
Die position=11h
Obverse: King standing left wearing triangular headdress.
Reverse: Shiva facing, holding diadem; and the bull.
Peroz I Kushanshah (circa 250 - 265 AD)
AE Drachm
Cribb SI 19, #19 (Bactrian issues); Gobl Kushan 1101; Mitchiner ACW 1275
19 mm.
3.59 gm.
Die position=11h
Obverse: King standing left wearing triangular headdress.
Reverse: Shiva facing, holding diadem; and the bull.
Peroz I Kushanshah (circa 250 - 265 AD)
AE Drachm
Cribb SI 19, #20 (Bactrian issues); Gobl Kushan 1105-1108 type; Mitchiner ACW 1278
15 x 17 mm.
2.72 gm.
Die position=11h
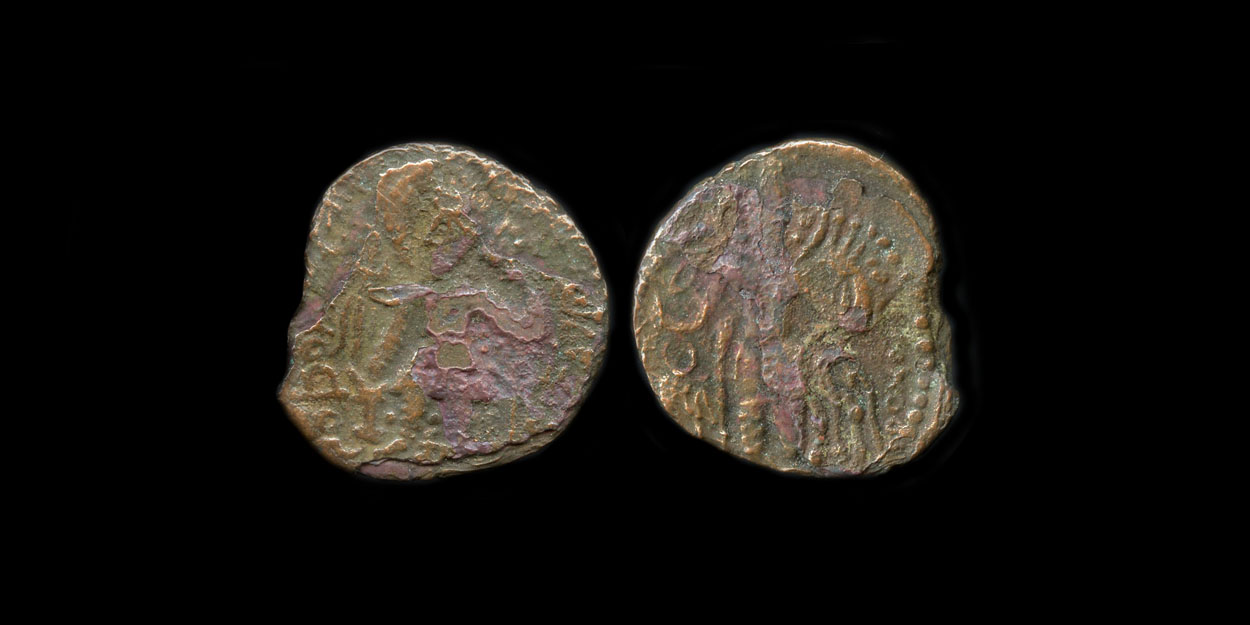
Obverse: King standing left wearing lion headdress, holding trident in left hand, right hand lowered over altar. Trident in left field, three pellets under king's arm; Nandipada symbol in right field. Bactrian legend.
Reverse: Shiva facing, holding diadem; and the bull.
Peroz I Kushanshah (circa 250 - 265 AD)
AE Drachm
Cribb SI 19, #20 (Bactrian issues); Gobl Kushan 1105-1108 type; Mitchiner ACW 1278
15 x 16 mm.
2.28 gm.
Die position=11h
Obverse: King standing left wearing lion headdress, holding trident in left hand, right hand lowered over altar. Trident in left field, three pellets under king's arm; Nandipada symbol in right field. Bactrian legend.
Reverse: Shiva facing, holding diadem; and the bull.
Peroz I Kushanshah (circa 250 - 265 AD)
AE Drachm
Cribb SI 19, #20 (Bactrian issues); Gobl Kushan 1105-1108 type; Mitchiner ACW 1278
14 x 16 mm.
2.10 gm.
Die position=12h
Obverse: Bearded king standing left wearing lion (?) headdress, holding trident in left hand, right hand lowered over altar. Trident in left field, three pellets under king's arm; Nandipada symbol in right field. Pellet between king's legs; Bactrian legend.
Reverse: Shiva facing (with three faces (?)), holding diadem; and the bull.
Note: Courtesy Jamison T. Graff collection.
Peroz I Kushanshah (circa 250 - 265 AD)
AE Drachm
Cribb SI 19, #20 (Bactrian issues); Gobl Kushan 1105-1108 type; Mitchiner ACW 1278
14 x 15 mm.
1.94 gm.
Die position=12h
Obverse: Bearded king standing left wearing lion ((?) it doesn't really look like a lion, does it; more like a horse) headdress, holding trident in left hand, right hand lowered over altar. Trident in left field, three pellets under king's arm; Nandipada symbol in right field. Pellet between king's legs; Bactrian legend.
Reverse: Shiva facing (with three faces (?)), holding diadem; and the bull.
Peroz I Kushanshah (circa 250 - 265 AD)
AE Drachm
Cribb SI 19, #20 (Bactrian issues); Gobl Kushan 1105-1108 type; Mitchiner ACW 1278
16 mm.
1.77 gm.
Die position=12h
Obverse: King standing left wearing lion headdress, holding trident in left hand, right hand lowered over altar. Trident in left field, three pellets under king's arm; Nandipada symbol in right field. Bactrian legend.
Reverse: Shiva facing, holding diadem; and the bull.
Note: Lower weight and cruder style.
Peroz I Kushanshah (circa 250 - 265 AD)
AE Drachm
Cribb SI 19, #20
18 mm.
2.37 gm.
Die position=12h
Obverse:
Reverse:
![]()
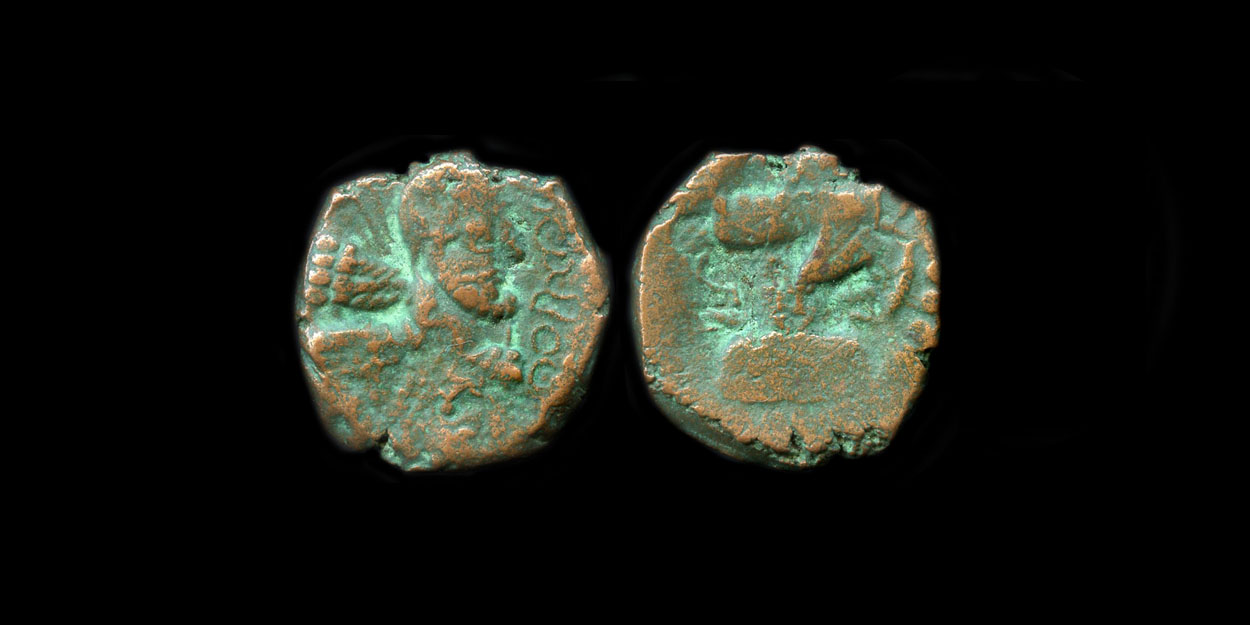
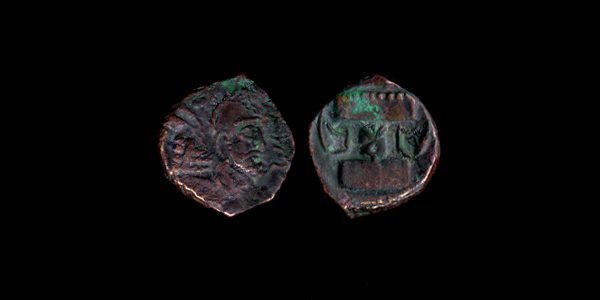
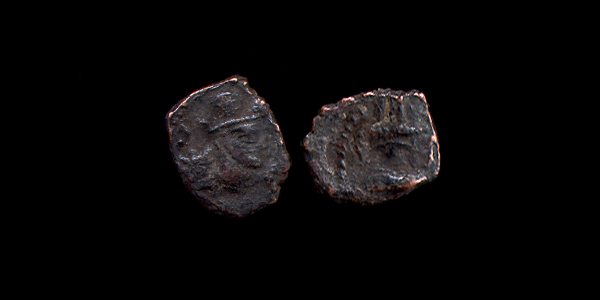
In Gandhara, Hormazd issued coins in the names of his governors (?), 'Kavad' and 'Meze' (unless these are titles or represent something unknown).
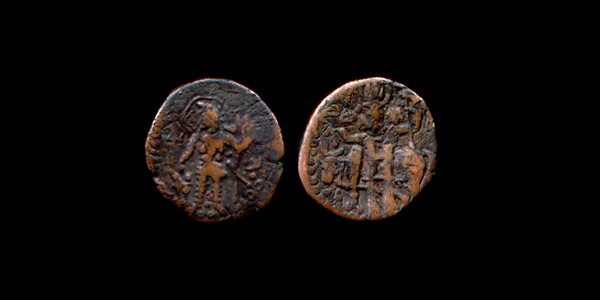
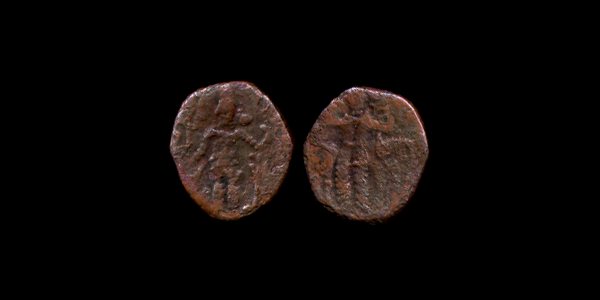
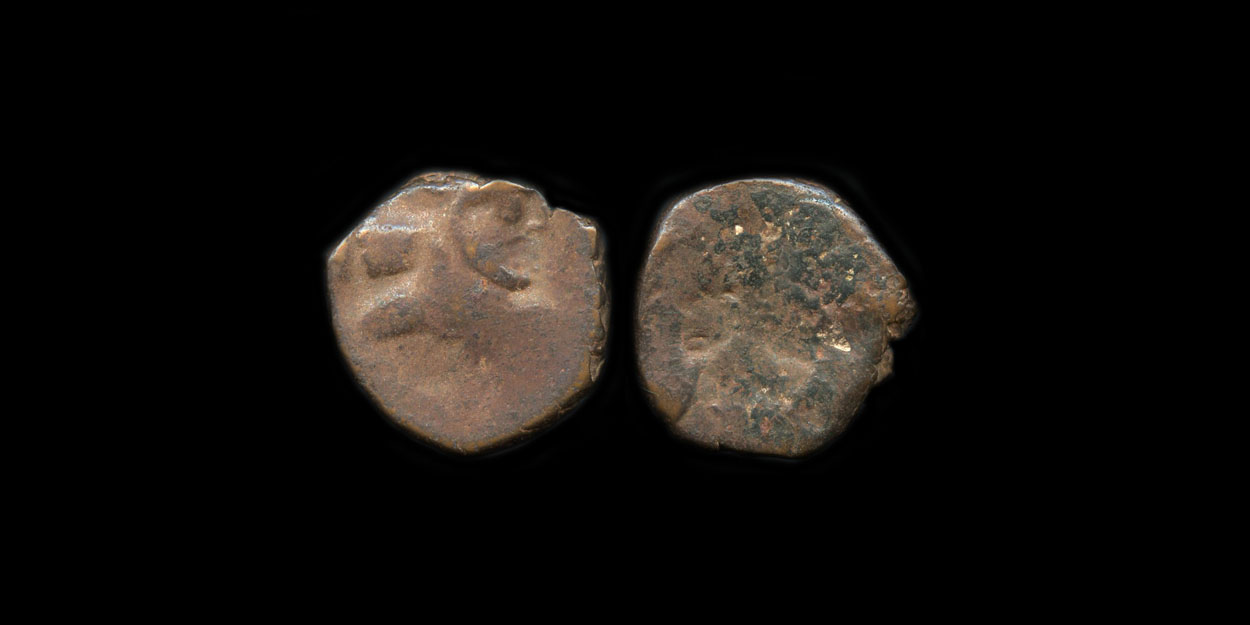
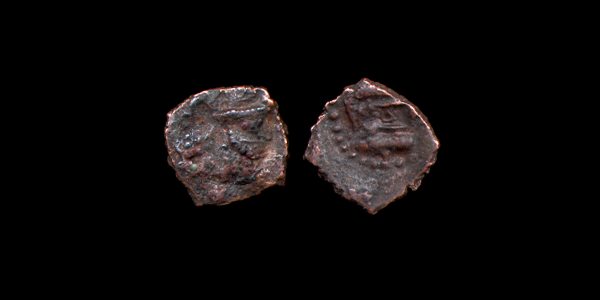
Hormazd I Kushanshah (circa 265 - 295 AD)
AE Drachm
Cribb SI 19, #22; Gobl Kushan 1034
15 x 18 mm.
1.96 gm.
Die position=3h
Obverse: "Hunnic" mark above head
Reverse:
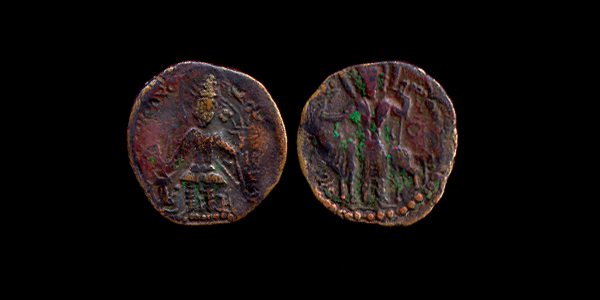
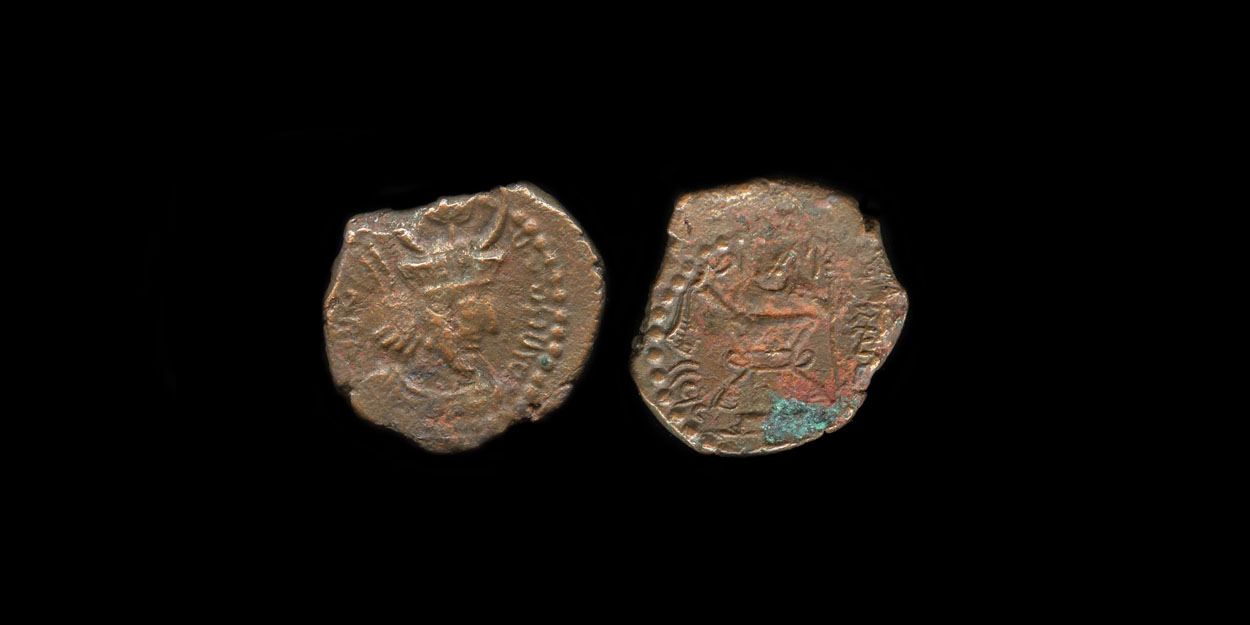
Hormazd I Kushanshah (circa 265 - 295 AD)
AE Drachm
Cribb SI 19, #23 (Bactrian issues); Mitchiner ACW 1269v.; Gobl Kushan 1046
15 mm.
2.20 gm.
Die position=12h
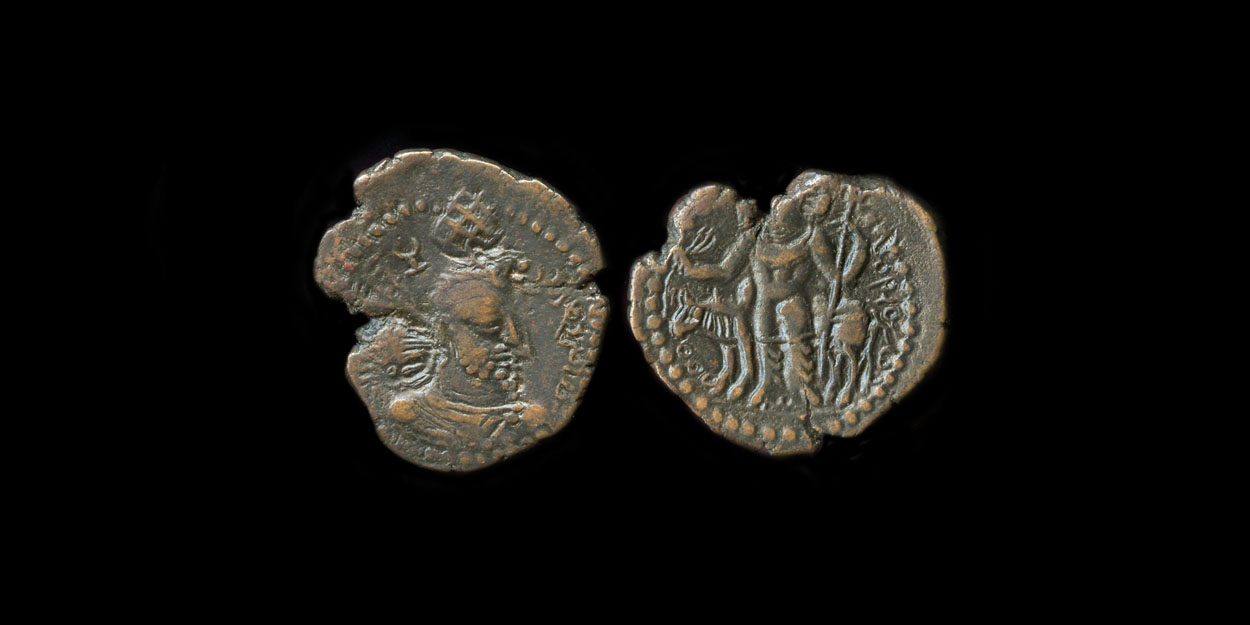
Obverse: Bearded bust right wearing lion headdress with segmented ball (?); two dots behind. Long ribbons flow upward from ball of hair, behind. Partial Pahlavi legend. Baktrian mint.
Reverse: King receiving diadem from Anahita (investiture scene).
Hormazd I Kushanshah (circa 265 - 295 AD)
AE Drachm
Cribb SI 19, #23 (Bactrian issues); Mitchiner ACW 1269v.; Gobl Kushan 1044
15 mm.
2.21 gm.
Die position=1h
Obverse: Bearded bust right wearing lion headdress with segmented ball (?); crescent behind. Long ribbons flow upward from ball of hair, behind. Partial Pahlavi legend. Baktrian mint.
Reverse: King receiving diadem from Anahita (?) (investiture scene).
Note: Courtesy Jamison T. Graff collection.

Hormazd I Kushanshah (circa 265 - 295 AD)
AE Drachm
Cribb SI 19, #24 (Bactrian issues); Mitchiner ACW 1281; Gobl Kushan 1052
15 mm.
2.05 gm.
Die position=2h
Obverse: Bearded bust right wearing lion headdress with segmented ball (?); nothing behind. Long ribbons flow upward from ball of hair, behind. Pahlavi legend.
Reverse: Anahita (?) emerging from altar. Pahlavi legend.
Hormazd I Kushanshah (circa 265 - 295 AD)
AE Drachm
Cribb SI 19, #24 (Bactrian issues); Mitchiner ACW 1280; Gobl Kushan 1071v.
15 x 16 mm.
2.14 gm.
Die position=8h
Obverse: Bearded bust right wearing lion headdress with segmented ball (?); crescent and two dots behind. Long ribbons flow upward from ball of hair, behind. Pahlavi legend.
Reverse: Mithra (?) emerging from altar. Pahlavi legend.
Hormazd I Kushanshah (circa 265 - 295 AD)
AE Drachm
Cribb SI 19, #24; similar to Gobl Kushan 1068
14 x 15 mm.
2.25 gm.
Die position=9h
Obverse:
Reverse:
Hormazd I Kushanshah (circa 265 - 295 AD)
AE Drachm
Cribb SI 19, #24
13 x 15 mm.
2.05 gm.
Die position=8h
Obverse:
Reverse:

Hormazd I Kushanshah (circa 265 - 295 AD)
AE Drachm
Cribb SI 19, #24; similar to Gobl Kushan 1022
14 mm.
2.03 gm.
Die position=4h
Obverse:
Reverse:
Hormazd I Kushanshah (circa 265 - 295 AD)
AE Drachm
Cribb SI 19, #25 (Bactrian issues); Mitchiner ACW -; Gobl Kushan 1091
15 x 14 mm.
2.28 gm.
Die position=3h
Obverse: Bearded bust right wearing winged headdress. Pahlavi legend.
Reverse: Anahita emerging from altar. Pahlavi legend.
Hormazd I Kushanshah (circa 265 - 295 AD)
AE Drachm
Cribb SI 19, #25; Gobl Kushan 1091
13 mm.
2.14 gm.
Die position=9h
Obverse:
Reverse:
"Kabod" Kushanshah (circa ___ AD)
AE Drachm
Cribb SI 19, #34; Gobl Kushan 1124 (?)
19 mm.
3.80 gm.
Die position=12h
Obverse:
Reverse:
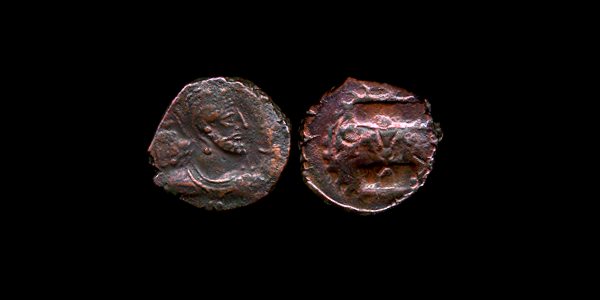
Hormazd I Kushanshah (circa 265 - 295 AD)
AE Drachm
Cribb SI 19, #35
18 x 16 mm.
4.09 gm.
Die position=12h
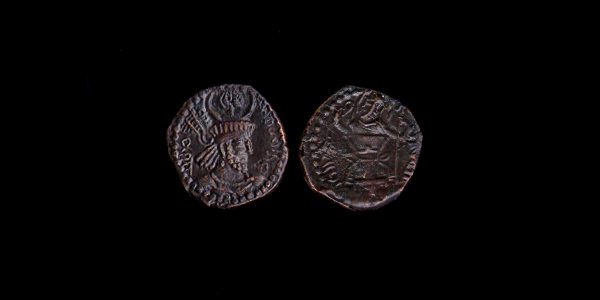
Obverse: Pahlavi legend; Governor 'Meze' (?). Gandhara mint.
Reverse: Fire altar with 'Gondopharan' symbol on shaft; bust on altar.
Hormazd I Kushanshah (circa 265 - 295 AD)
AE Drachm
Cribb SI 19, #35
16 x 18 mm.
3.67 gm.
Die position=12h
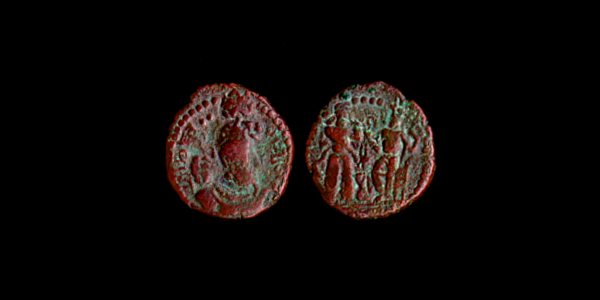
Obverse: Bearded bust right; Governor 'Meze' (?). Gandhara mint.
Reverse: Fire altar with 'Gondopharan' symbol on shaft; bust on altar.

Hormazd I Kushanshah (circa 265 - 295 AD)
AE Drachm
Cribb SI 19, #35
16 x 15 mm.
3.93 gm.
Die position=12h
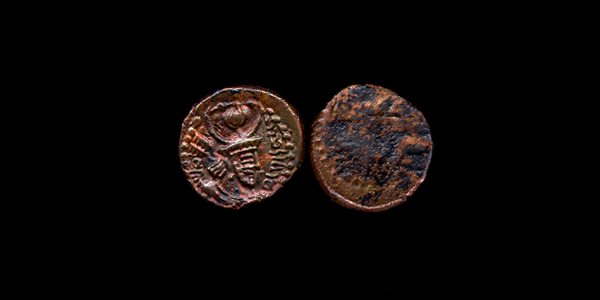
Obverse: Bearded bust right; Governor 'Meze' (?). Gandhara mint.
Reverse: Fire altar with 'Gondopharan' symbol on shaft; bust on altar.
Hormazd I Kushanshah (circa 265 - 295 AD)
AE Drachm
Cribb SI 19, #35
18 x 17 mm.
4.13 gm.
Die position=12h
Obverse: Bearded bust right; Governor 'Meze' (?). Gandhara mint.
Reverse: Fire altar with 'Gondopharan' symbol on shaft; bust on altar.

Hormazd I Kushanshah (circa 265 - 295 AD)
AE Drachm
Cribb SI 19, #35
16 x 15 mm.
3.94 gm.
Die position=n/a
Obverse:
Reverse:
Hormazd I Kushanshah (circa 265 - 295 AD)
AE Drachm
Cribb SI 19, #35
15 mm.
3.70 gm.
Die position=12h
Obverse:
Reverse:

Hormazd I Kushanshah (circa 265 - 295 AD)
AE Drachm
Cribb SI 19, #35
17 x 14 mm.
3.38 gm.
Die position=12h
Obverse:
Reverse:
Hormazd I Kushanshah (circa 265 - 295 AD)
AE Drachm
Cribb SI 19, #35
16 mm.
3.42 gm.
Die position=1h
Obverse: Bearded bust right; Governor 'Meze' (?). Gandhara mint.
Reverse: Fire altar with 'Gondopharan' symbol on shaft; bust on altar.
Hormazd I Kushanshah (circa 265 - 295 AD)
AE Drachm
Cribb SI 19, #35; Gobl Kushan 1124
16 x 15 mm.
3.10 gm.
Die position=1h
Obverse:
Reverse:
Hormazd I Kushanshah (circa 265 - 295 AD)
AE Drachm
Cribb SI 19, #35; Gobl Kushan 1125
15 mm.
3.38 gm.
Die position=11h
Obverse:
Reverse:
Hormazd I Kushanshah (circa 265 - 295 AD)
AE Drachm
Cribb SI 19, #35 type
15 mm.
2.75 gm.
Die position=2h
Obverse:
Reverse:
Note: Imitation?
Hormazd I Kushanshah (circa 265 - 295 AD)
AE Drachm
Cribb SI 19, #35 type
15 x 14 mm.
3.47 gm.
Die position=12h
Obverse:
Reverse:

Hormazd I Kushanshah (circa 265 - 295 AD)
AE Drachm
Cribb SI 19, #35 type
15 x 16 mm.
3.48 gm.
Die position=11h
Obverse:
Reverse:
Hormazd I Kushanshah (circa 265 - 295 AD)
AE Drachm
Cribb SI 19, #35 type
14 x 15 mm.
3.51 gm.
Die position=n/a
Obverse:
Reverse:
Hormazd I Kushanshah (circa 265 - 295 AD)
AE Drachm
Cribb SI 19, #35 type
15 mm.
3.21 gm.
Die position=6h
Obverse:
Reverse:
Hormazd I Kushanshah (circa 265 - 295 AD)
AE Drachm
Cribb SI 19, #35 type
15 mm.
3.46 gm.
Die position=12h
Obverse:
Reverse:
Hormazd I Kushanshah (circa 265 - 295 AD)
AE Drachm
Cribb SI 19, #35 (Gandharan issues); Gobl Kushan 1125; Mitchiner ACW 1284v.
16 mm.
3.75 gm.
Die position=12h
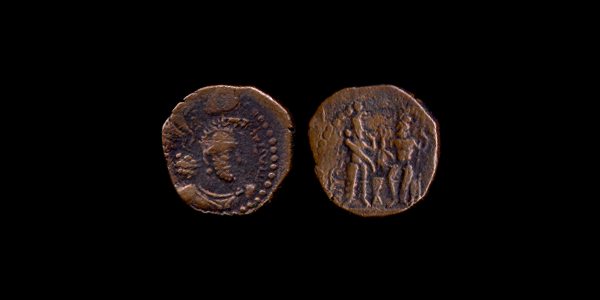
Obverse: Bearded bust right wearing lion headdress. Long ribbons flow upward from hair in pleats, behind. Partial Pahlavi legend; Governor 'Meze' (?). Gandhara mint.
Reverse: Fire altar with 'Gondopharan' symbol on shaft; bust on altar.
Hormazd I Kushanshah (circa 265 - 295 AD)
AE Drachm
Cribb SI 19, #35 (Gandharan issues); Gobl Kushan 1125; Mitchiner ACW 1284v.
17 mm.
3.82 gm.
Die position=2h
Obverse: Bearded bust right wearing lion headdress. Long ribbons flow upward from hair in pleats, behind. Partial Pahlavi legend; Governor 'Meze' (?). Gandhara mint.
Reverse: Fire altar with 'Gondopharan' symbol on shaft; bust on altar.
Hormazd I Kushanshah (circa 265 - 295 AD)
AE Drachm
Cribb SI 19, #35 (Gandharan issues); Gobl Kushan 1125; Mitchiner ACW 1284v.
17 mm.
3.46 gm.
Die position=11h
Obverse: Bearded bust right wearing lion headdress. Long ribbons flow upward from hair in pleats, behind. Partial Pahlavi legend; Governor 'Meze' (?). Gandhara mint.
Reverse: Fire altar with 'Gondopharan' symbol on shaft; bust on altar.
Hormazd I Kushanshah (circa 265 - 295 AD)
AE Drachm
Cribb SI 19, #35 (Gandharan issues); Gobl Kushan 1125; Mitchiner ACW 1284v.
16 x 14 mm.
3.68 gm.
Die position=12h
Obverse: Bearded bust right wearing lion headdress. Long ribbons flow upward from hair in pleats, behind. Partial Pahlavi legend; Governor 'Meze' (?). Gandhara mint.
Reverse: Fire altar with 'Gondopharan' symbol on shaft; bust on altar.

Hormazd I Kushanshah (circa 265 - 295 AD)
AE Drachm
Cribb SI 19, #35 (Gandharan issues); Gobl Kushan 1125; Mitchiner ACW 1284v.
15 mm.
3.29 gm.
Die position=11h
Obverse: Bearded bust right wearing lion headdress. Long ribbons flow upward from hair in pleats, behind. Partial Pahlavi legend; Governor 'Meze' (?). Gandhara mint.
Reverse: Fire altar with 'Gondopharan' symbol on shaft; bust on altar.
![]()
Hormazd II Kushanshah (circa 295 - 300 AD)
AE Drachm
Cribb SI 19, #36 (?)
19 mm.
2.99 gm.
Die position=12h
Obverse:
Reverse:
![]()
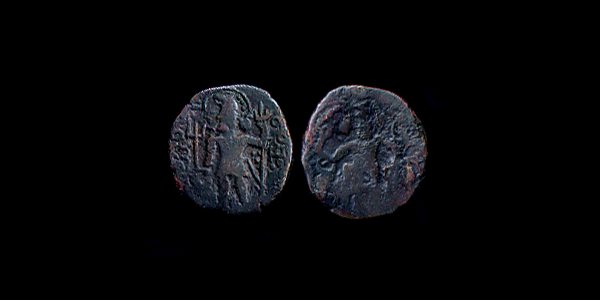
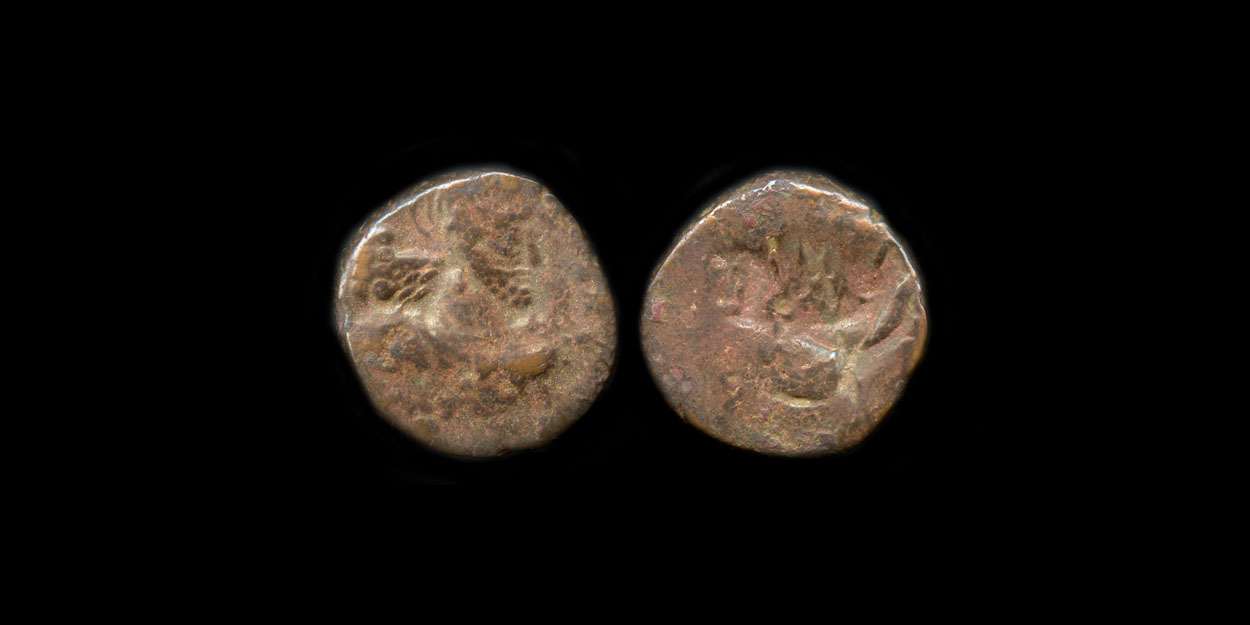
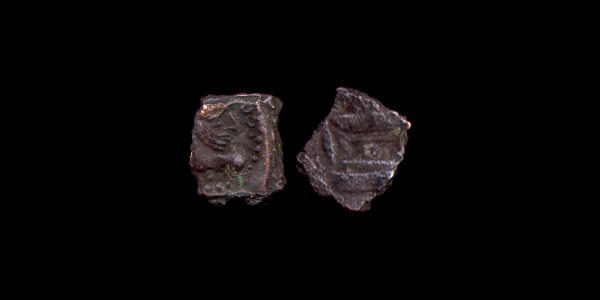
Peroz II Kushanshah (circa 300 - 325 AD)
AE Drachm
Cribb SI 19, #26; Gobl Kushan 1084
15 x 14 mm.
1.90 gm.
Die position=3h
Obverse:
Reverse:
Peroz II Kushanshah (circa 300 - 325 AD)
AE Drachm
Cribb SI 19, #26 (Bactrian issues); Gobl Kushan 1083v.; Mitchiner ACW 1288v.
14 mm.
2.08 gm.
Die position=12h
Obverse: Bearded bust right wearing horned headdress; '8' behind crown. Long ribbons flow upward from ball of hair, behind. Pahlavi legend. Bactrian mint.
Reverse: Fire altar with god Mithra (?). Pahlavi legend.

Peroz II Kushanshah (circa 300 - 325 AD)
AE Drachm
Cribb SI 19, #26 (Bactrian issues); Gobl Kushan 1081; Mitchiner ACW 1288v.
15 mm.
2.08 gm.
Die position=12h
Obverse: Bearded bust right wearing horned headdress. Long ribbons flow upward from ball of hair, behind. Pahlavi legend. Bactrian mint.
Reverse: Fire altar with god Mithra (?). Pahlavi legend.
Peroz II Kushanshah (circa 300 - 325 AD)
AE Drachm
Cribb SI 19, #26 (Bactrian issues); Gobl Kushan 1081; Mitchiner ACW 1288v.
15 mm.
2.57 gm.
Die position=1h
Obverse: Bearded bust right wearing horned headdress. Long ribbons flow upward from ball of hair, behind. Pahlavi legend. Bactrian mint.
Reverse: Fire altar with god Mithra (?). Pahlavi legend. Struck from very worn die.
Peroz II Kushanshah (circa 300 - 325 AD)
AE Drachm
Cribb SI 19, #26; Gobl Kushan 1081 (?)
15 mm.
1.70 gm.
Die position=3h
Obverse:
Reverse:
Peroz II Kushanshah (circa 300 - 325 AD)
AE Drachm
Cribb SI 19, #26; Gobl Kushan 1082 - 1084
13 x 14 mm.
1.86 gm.
Die position=2h
Obverse:
Reverse:
![]()
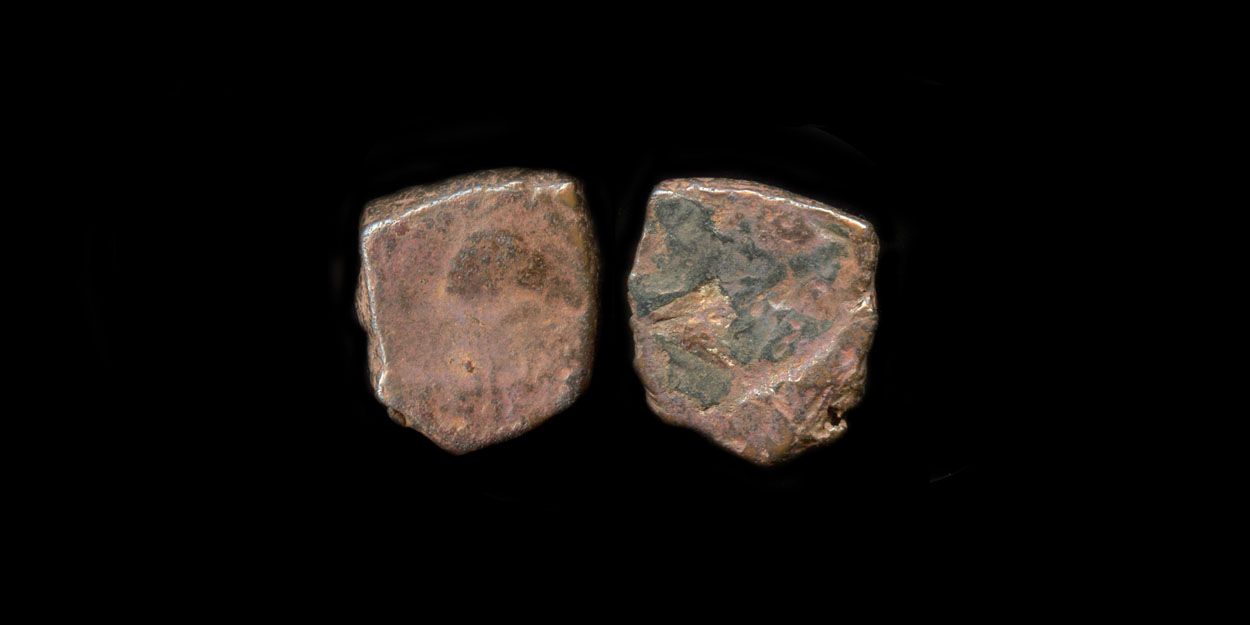
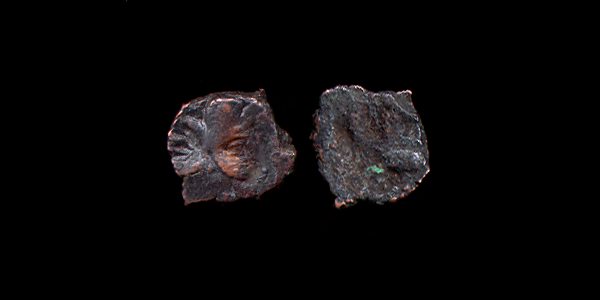
Unknown Kushanshah (circa (?) AD)
AE Drachm
Cribb SI 19, # -; Gobl Kushan 1129.1 (one listed)
17 mm.
3.13 gm.
Die position=12h
Obverse: Bust left.
Reverse:
![]()
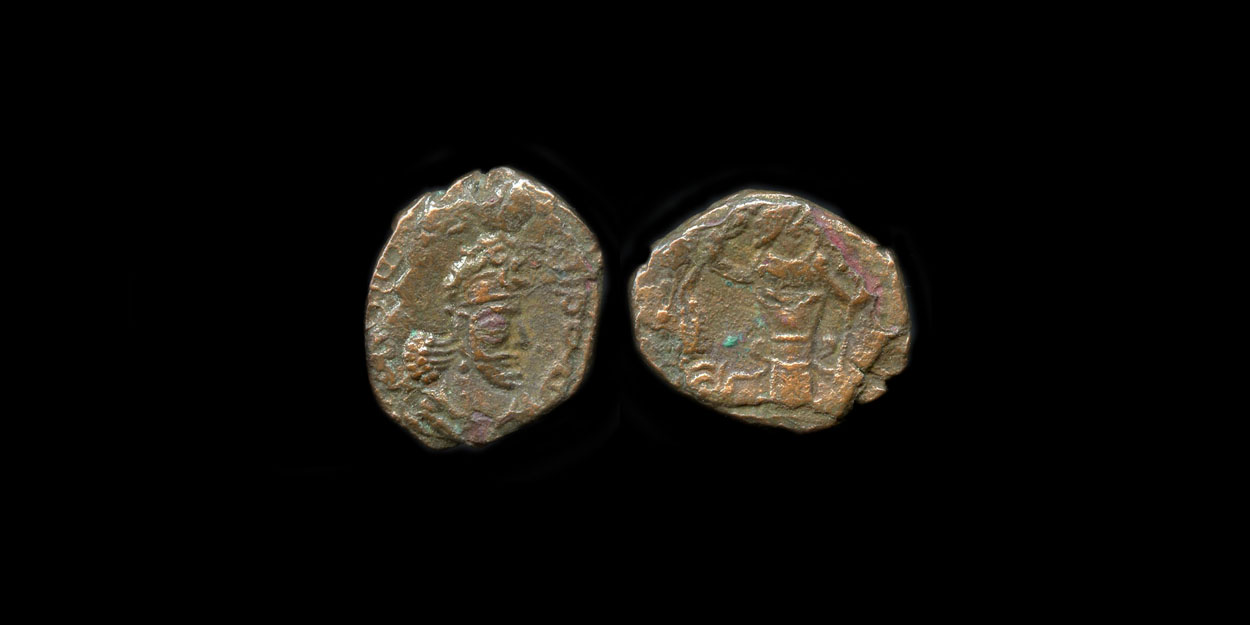
Shapur II (circa 325 - 340 AD)
AE Drachm
Cribb SI 19, #39 (Gandharan issues); Gobl Kushan - (similar to 1121); Mitchiner ACW -
15 x 16 mm.
2.24 gm.
Die position=11h
Obverse: Bearded bust right wearing crown of Shapur. Bactrian legend.
Reverse: Fire altar with flames; diadem symbol on altar shaft.
Shapur II (circa 325 - 340 AD)
AE Drachm
Cribb SI 19, #39 (Gandharan issues); Gobl Kushan - (similar to 1121); Mitchiner ACW -
11 x 13 mm.
2.08 gm.
Die position=11h
Obverse: Bearded bust right wearing crown of Shapur. Bactrian legend.
Reverse: Fire altar with flames; diadem symbol on altar shaft.
Shapur II (circa 325 - 340 AD)
AE Drachm
Cribb SI 19, #39 (Gandharan issues); Gobl Kushan - (similar to 1121); Mitchiner ACW -
15 x 13 mm.
2.01 gm.
Die position=9h
Obverse: Bearded bust right wearing crown of Shapur. Bactrian legend.
Reverse: Fire altar with flames; diadem symbol on altar shaft.
Shapur II (circa 325 - 340 AD)
AE Drachm
Cribb SI 19, #39 (Gandharan issues); Gobl Kushan - (similar to 1121); Mitchiner ACW -
13 x 15 mm.
2.30 gm.
Die position=10h
Obverse: Bearded bust right wearing crown of Shapur. Bactrian legend.
Reverse: Fire altar with flames; diadem symbol on altar shaft.
![]()
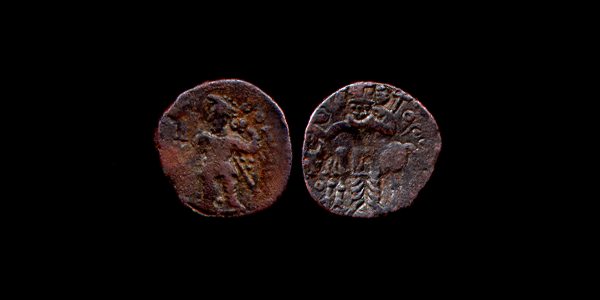
'Varhran I' (circa 325 AD (?))
AV Stater
Cribb SI 8v.; Mitchiner ACW 1300v., Gobl Kushan 713v.
30 x 31 mm.
7.65 gm.
Die position=12h
Obverse: King standing left holding trident; Nandipada symbol in right field. Swastika between legs; three pellets under left arm. 'BOXLO' (Balkh) in right field.
Reverse: Shiva and bull.
Note: Courtesy Peter A. Linenthal collection.
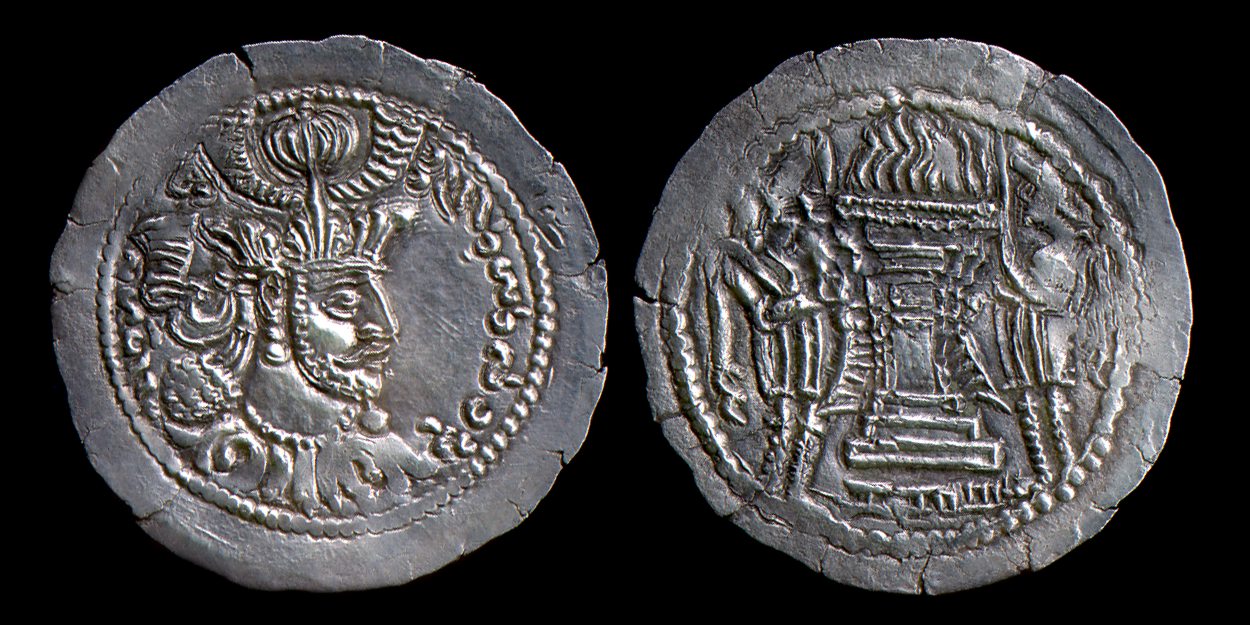
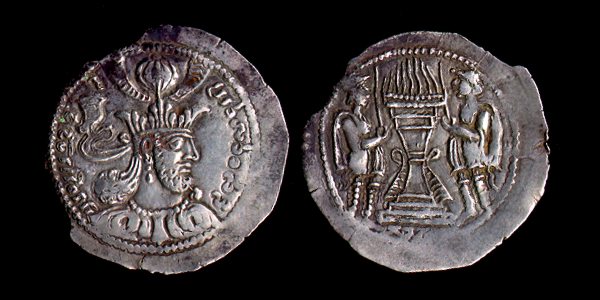
'Varhran II' (circa 340 AD (?))
AR Drachm
Cribb SI 19 -; Mitchiner ACW 1311 [Varhran II Kushanshah], Gobl Hunnen Em. 28A [Hunnic Intermediate Group - 'Varhran']
28 x 29 mm.
2.96 gm.
Diameter of obverse dotted border=22 mm.; diameter of reverse border=26 mm.
Die position=3h
Obverse: Bust of Shapur II right; Pahlavi legend.
Reverse: Fire altar with two attendants.
![]()
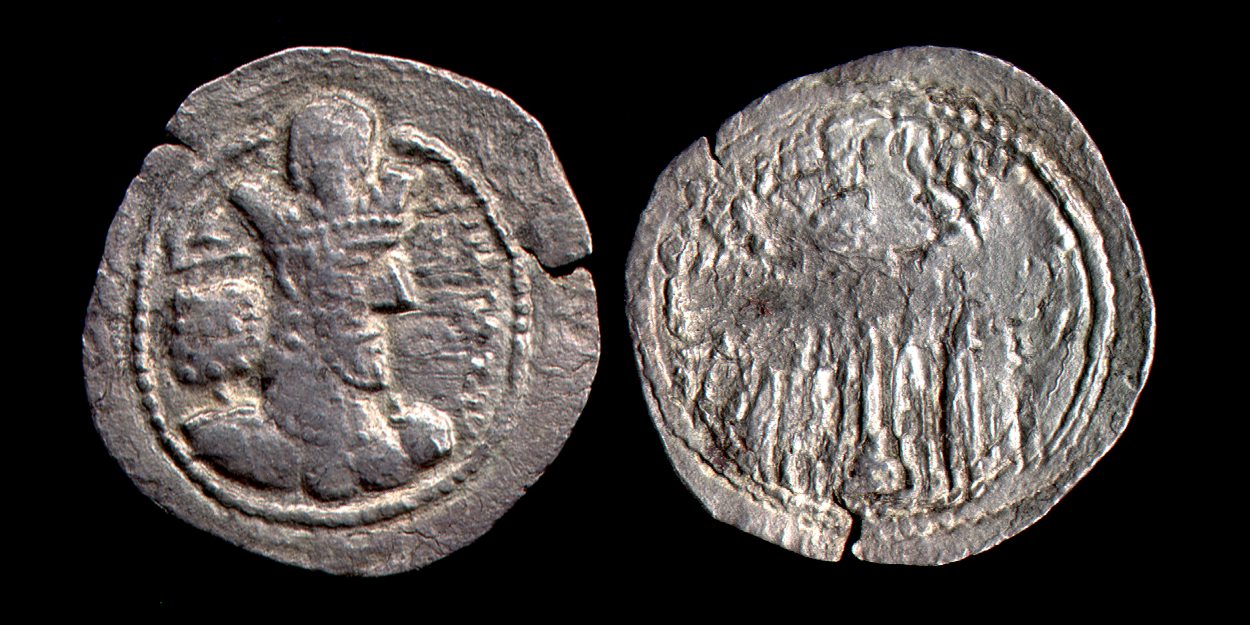
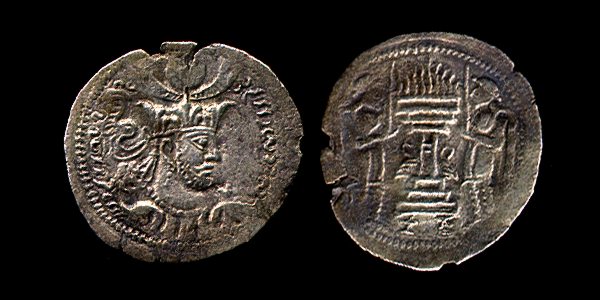
'Varhran of Gandhara' (circa 340 AD (?))
AR Drachm
Cribb SI 19, #78 [Kidarites]; Mitchiner ACW 1305v. [Varhran I Kushanshah], Gobl Hunnen Em. 8 [Varhran Kushanshah]
29 mm.
3.84 gm. (10% loss of metal from chipping)
Die position=3h
Obverse: Bearded bust right wearing earring and personal headdress with pendants and 'artichoke' ornament above. Ribbon flows back from crown. Pahlavi legend, slightly abbrieviated.
Reverse: Fire altar with two attendants; three Brahmi letters below.
'Varhran of Gandhara' (circa 340 AD (?))
AR Drachm
Cribb SI 19, #78 [Kidarites]; Mitchiner ACW 1305 [Varhran I Kushanshah], Gobl Hunnen Em. 9 [Varhran Kushanshah]
27 x 25 mm.
2.71 gm.
Die position=4h
Obverse: Bearded bust right wearing earring and personal headdress with pendants and 'artichoke' ornament above. Ribbon flows back from crown. Pahlavi legend, slightly abbrieviated.
Reverse: Fire altar with two attendants; two Brahmi letters below.
![]()
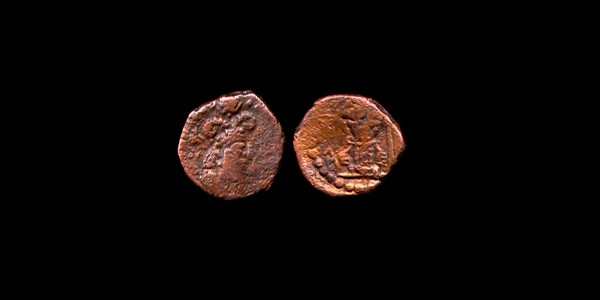
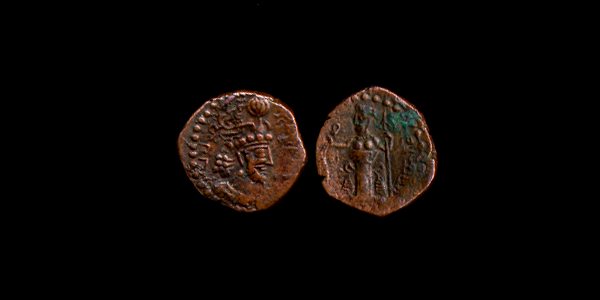
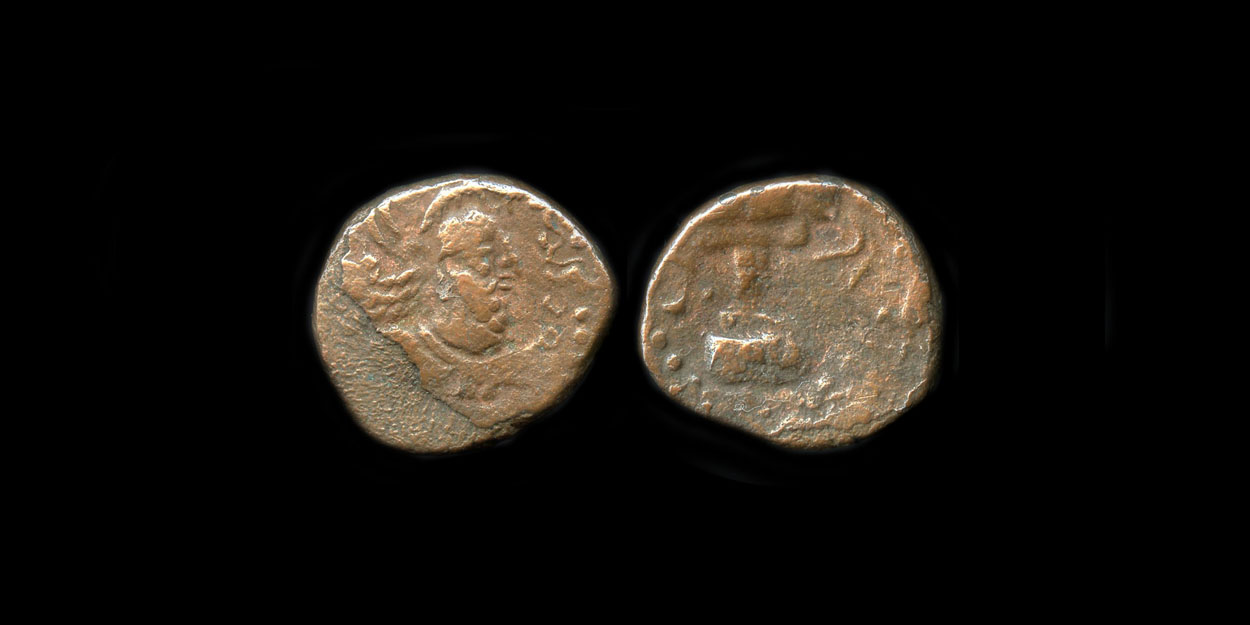
"Varahran" Kushanshah (Peroz III) (circa 350 (?) AD)
AE Unit
Mitchiner ACW 1312
13 mm.
1.40 gm.
Die position=9h
Obverse: Bust, right wearing ram's horns headdress with 'artichoke' ornament above.
Reverse: Fire altar with bust of Mithra (?) above. Pahlavi legend.
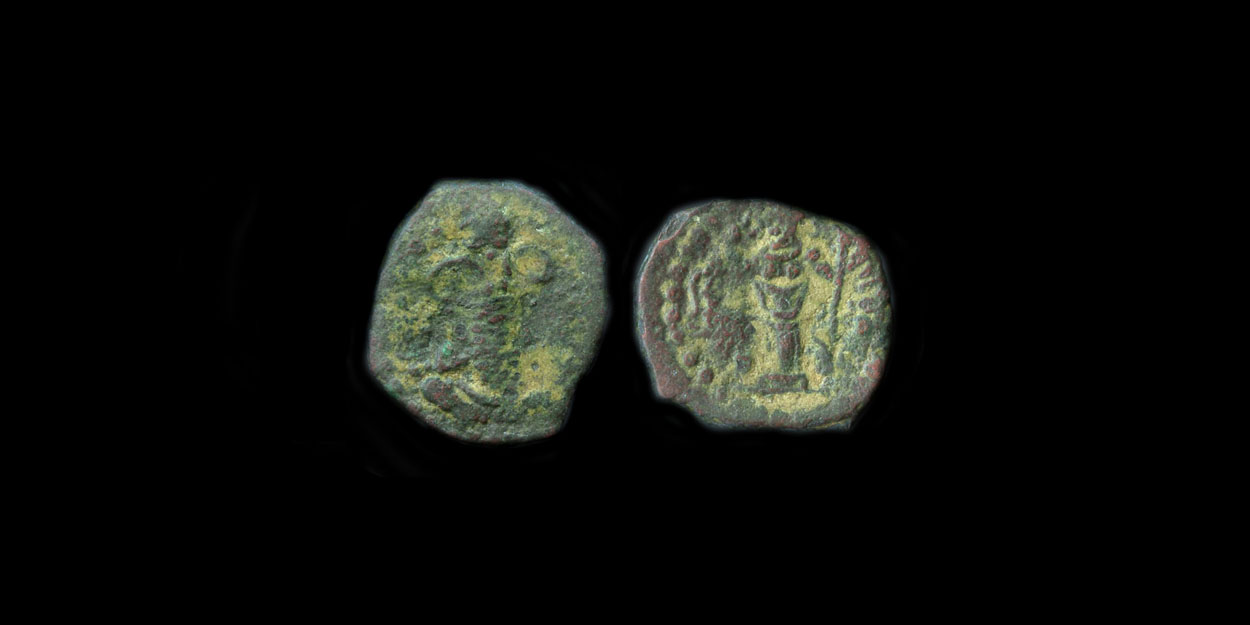
"Varahran" Kushanshah (Peroz III) (circa 350 (?) AD)
AE Drachm
Cribb SI 19, #28; Mitchiner ACW 1312
14 x 15 mm.
1.54 gm.
Die position=3h
Obverse: Bust, right wearing ram's horns headdress with 'artichoke' ornament above.
Reverse: Fire altar with bust of Mithra (?) above. Pahlavi legend.
b a c k t o a n c i e n t c o i n s